BabyFaceDolls.com
Sample menu:
Ms Pamela's Photography Tutorial - page 3
More About Posing, Camera Position and Lighting
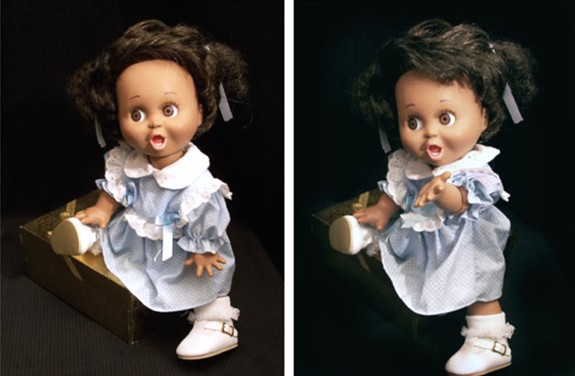
I can’t count the times I have seen people selling a Baby Face and they just prop her up and snap a foto of her! Notice the foto on the left of AA Suzie. What all do you see wrong with it? Notice how the sleeve of her dress is hanging down… her arm just dangling there lifeless… her hair is all pushed back so that all you notice is her large forehead! And the light is knocking out the texture of the dress and collar and giving the backdrop a dull glow. However, when I pose little Miss Suzie just a tad different and bounce the light off the wall and brush her bangs down a bit, look how cute she is!!
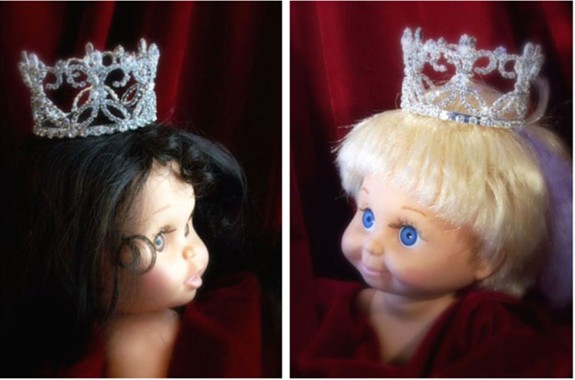
When you have a portion of your foto that you want to stand out… for instance, in this foto we used to show our crowns we use for the Miss Baby Face Pageant each year. The foto on the right you see Marcy but your attention is drawn more to the shine of the crown on her head…whereas the foto on the left of Charlene, you look first to her face. This is directional lighting. Again, it is important to do this indirectly! I used an umbrella and a flashlight! 
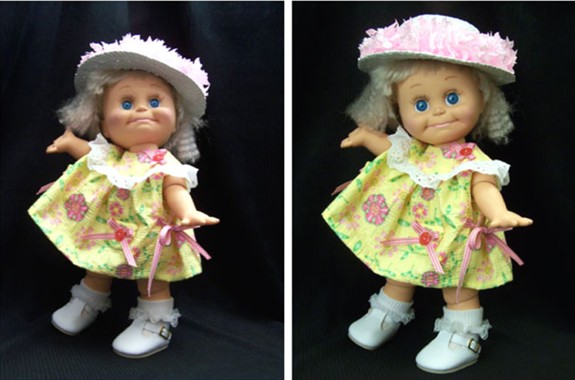
In these fotos of Sheila, the one on the left you see the camera was below her eye level and the lighting was above her. In the foto on the right, her head is lowered and the camera is directly in front of her and the lighting is bounced from lower on the opposite wall. This eliminates the shadows on her legs and on her face from the hat. See how much better just these little things make her look? She is definitely ready for the Baby Face Fashion Shows! Our girls love to model and show off their pretty clothes but what they are best at is showing off their charming little personalities. The Sheila on the right really knows how to capture the audience’s attention! 